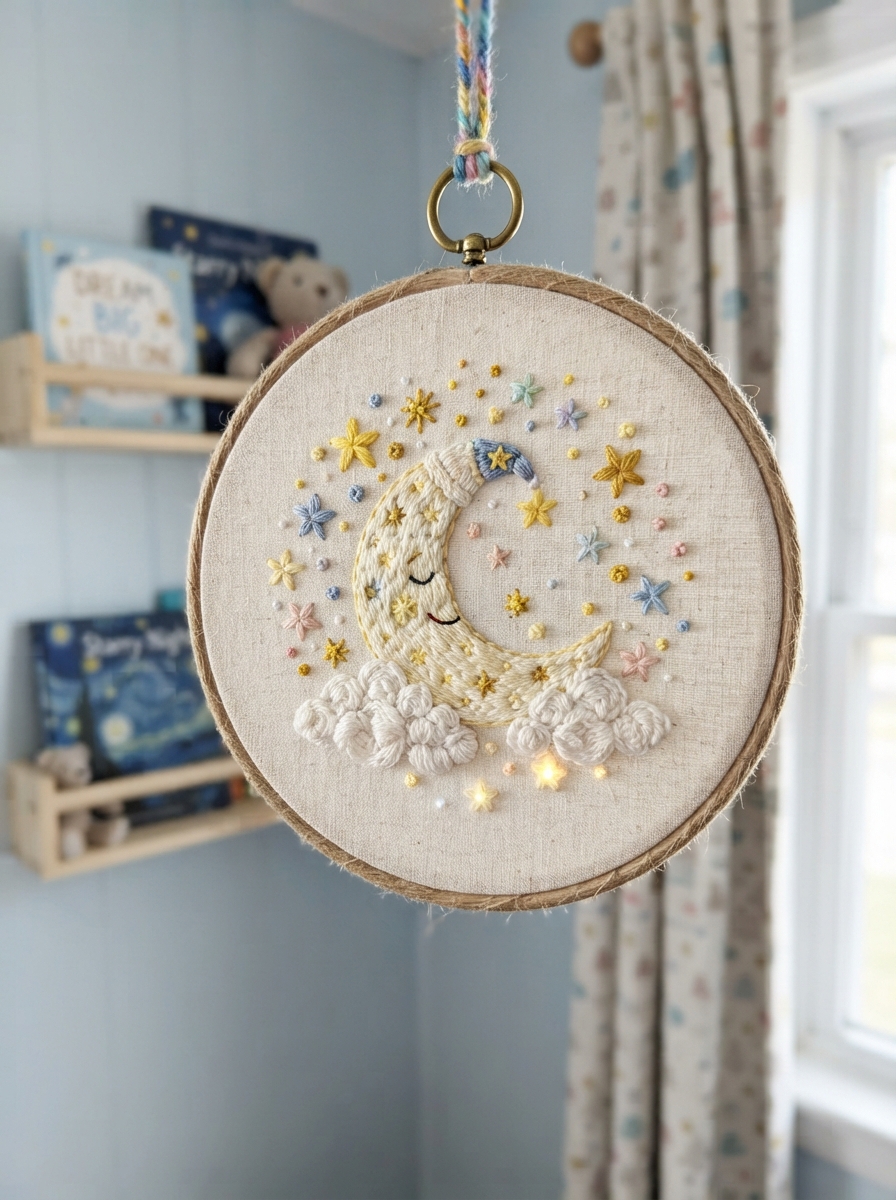
There is something magical about turning a simple piece of fabric into a tiny night sky. Moon and star embroidery is a charming beginner-friendly craft that combines creativity, colorful thread, and easy stitching techniques. Whether you are making a decorative hoop for a child’s bedroom, a handmade gift, or a relaxing weekend project, this design is simple enough for beginners while leaving plenty of room for imagination.
The best part is that you do not need advanced embroidery skills. With a few basic stitches and carefully chosen materials, you can create a beautiful celestial scene.

Why Try a Moon and Star Design?
Moon and star patterns are ideal for embroidery because they are made from simple shapes. A crescent moon can be outlined with backstitch, while tiny stars can be created with straight stitches.
| Feature | Beginner Benefit |
|---|---|
| Simple shapes | Easy to trace and stitch |
| Small details | Helps develop stitching control |
| Flexible colors | Encourages creativity |
| Compact design | Perfect for hoops and small gifts |
Materials You Will Need
Before starting, gather everything in one place. Keeping the supplies organized makes the project more enjoyable and prevents interruptions.
- Cotton, linen, or another suitable embroidery fabric
- Small embroidery hoop
- Embroidery floss
- Embroidery needle
- Embroidery scissors
- Fabric pencil or washable marker
- Moon and star template
- Optional beads or small felt pieces for decoration
Choosing Your Colors

A traditional night-sky palette might include navy blue, dark purple, white, silver, and yellow. However, embroidery does not have to follow realistic colors.
| Design Element | Traditional Colors | Creative Alternatives |
| Moon | Yellow, cream, white | Pink, lavender, gold |
| Stars | White, yellow | Silver, blue, pastel colors |
| Background | Navy, black | Purple, teal, light blue |
| Details | White or gold | Any contrasting shade |
How to Make Moon and Star Embroidery
1. Prepare the Fabric
Place your fabric inside the embroidery hoop and tighten it until the surface feels smooth. Avoid stretching it excessively because this can distort the fabric.
Lightly transfer a simple crescent moon and several stars using a washable fabric pencil.
For beginners, leave enough space between the shapes so the stitches are easy to see.
2. Outline the Moon
Thread your needle with the color selected for the moon. Backstitch is an excellent choice for creating a smooth outline.
Work slowly around the curved shape. Try to keep the stitches relatively similar in length, but do not worry if they are not perfect.
Add Texture
Once the outline is finished, you can leave the moon as a simple silhouette or add small details.
For example:
- Fill the moon with satin stitches.
- Add tiny straight stitches as decorative marks.
- Use a second color to create a subtle border.
- Add a few small beads for extra sparkle.
3. Stitch the Stars
Stars can be made using simple straight stitches. Start from the center and stitch outward to create a basic four-point star.
For a more playful design, make stars in different sizes. You can also create tiny dots between them to imitate distant stars.
A simple process is:
- Mark the center of each star.
- Stitch the main vertical and horizontal lines.
- Add diagonal lines if you want a six- or eight-point effect.
- Secure the thread neatly at the back.
4. Finish Your Project
When all the stitching is complete, inspect the front and back of the fabric. Carefully trim loose threads and make sure the embroidery remains smooth inside the hoop.
You can leave it in the hoop for a simple rustic decoration or place the finished piece inside a frame.
Practical Tips for Beginners
Small details can make a big difference in the final result.
- Use a larger design when learning.
- Keep your thread length manageable to reduce tangling.
- Do not pull stitches too tightly.
- Practice unfamiliar stitches on a scrap of fabric first.
- Choose thread colors that contrast clearly with the background.
- Take breaks during detailed sections.
A Creative Example
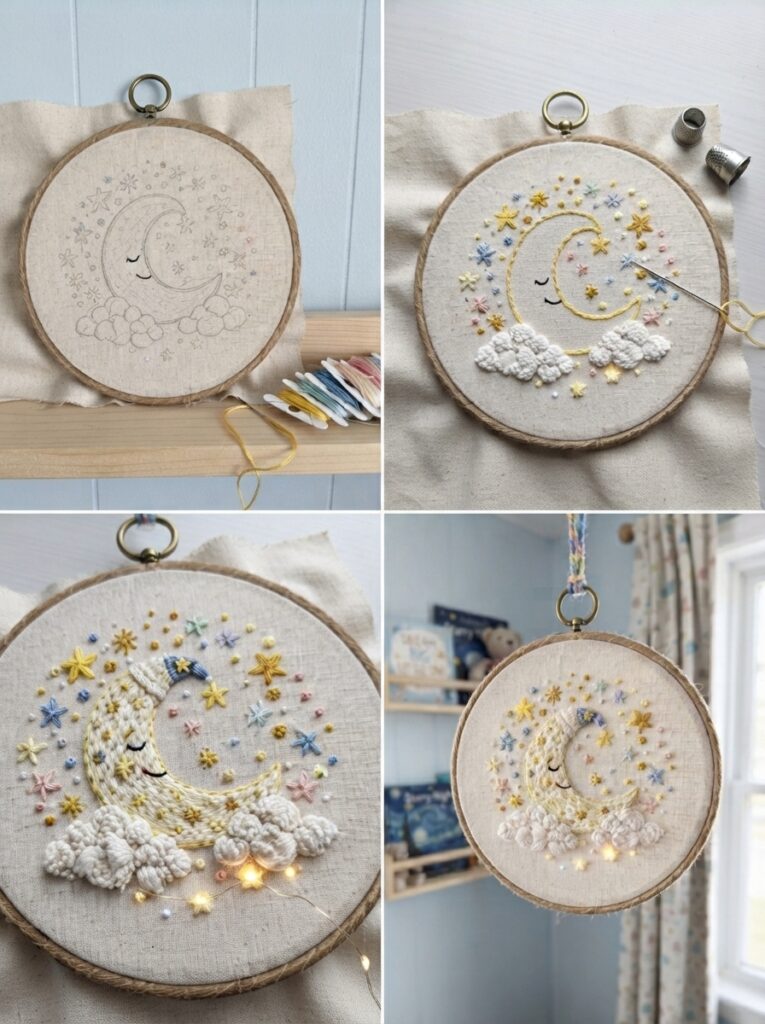
Imagine making a small navy-blue hoop for a child’s room. You could stitch a golden crescent moon in the center, surround it with white stars, and add tiny clouds underneath. Personalizing the design with a child’s favorite colors can turn a simple craft into a meaningful keepsake.
FAQ
1. Is moon and star embroidery suitable for beginners?
Yes. The basic design uses simple shapes and beginner-friendly stitches such as backstitch and straight stitch. Start with a small number of elements before attempting detailed patterns.
2. What fabric works best?
Cotton and linen are popular choices because they are comfortable to stitch and widely available. A medium-weight fabric is generally easier for beginners than very thin material.
3. How many strands of embroidery floss should I use?
For detailed outlines, using fewer strands can create delicate lines, while more strands produce bolder stitches. Beginners can experiment with two or three strands to find a comfortable thickness.
4. Can I add beads to the design?
Yes. Small beads can add sparkle to stars or decorative details. If children are involved, supervise bead handling carefully because small beads can be a choking hazard.
5. What can I do with finished moon and star embroidery?
You can display it in an embroidery hoop, frame it as wall art, turn it into a decorative card, or give it as a handmade gift. Small designs can also become patches for suitable fabric projects.
Conclusion
Moon and star embroidery is a relaxing and creative project that makes it easy to transform ordinary fabric into a charming night-sky scene. With simple outlines, straight stitches, and a few thoughtful color choices, beginners can create something beautiful without complicated techniques.
Most importantly, allow yourself to experiment. Make the moon bright or colorful, vary the size of the stars, and add your own details. Every little imperfection makes a handmade embroidery piece feel personal and unique.
Leave a Reply